 Several years ago, a designated pilot examiner was in the habit of asking his private applicants one question to fulfill the oral portion of the practical test, and only one. The question was this: “Which control makes the airplane go up?” If the applicant answered that the throttle makes it go up, he passed, but if he said the elevator makes the airplane go up, he failed the oral, and thus the entire flight test!
Sooner or later every student pilot becomes aware of the age-old controversy over which controls what, and the lines are drawn. Sides are chosen. Flight instructors often demonstrate one method or the other, depending on which the individual instructor favors. The demonstration of power to airspeed goes like this: The instructor says to the student, “You think the elevator controls airspeed? Come on, we’ll see.” They then taxi out and line up on the runway, and the instructor starts to furiously pump the yoke (or stick) back and forth, whereupon the student asks, “What on earth are you doing?”
And he gets this answer, “I’m trying to get up enough airspeed to take off!”
One famous air race pilot, when posed the question of what does which, answered by stating, “All I know is, when I lose a race, I go out and get a bigger motor!”
Of course, if the instructor subscribes to the power to altitude theory, he will ask the student, “You think the elevator controls altitude? Come on, let’s see.”
 They then take off, climb to a nice, safe altitude, and the instructor retards the throttle to idle, turns to the student and says, “You’ve got it. Now, if you think the elevator makes the airplane go up, pull back on the yoke (or stick) and make it go up!”
The fallacy in both these arguments is, of course, that there is an overlap in the functions of these two controls, and each controls either altitude or airspeed, depending on the flight condition. Currently, the FAA-preferred method of flight training favors pitching to altitude and powering to airspeed. This is just another example of insulting the intelligence of the primary student. How much easier it is to stabilize the airspeed with pitch on a VFR final approach and adjust the rate of descent with power. The student is then only juggling one variable, rather than two. But the student is taught to pitch to altitude and power to airspeed on the theory that later on, when he undertakes instrument training, this is the way it will be done, and the student lacks the intelligence to make the transition from powering to altitude and pitching to airspeed when the time comes.
Trim Revisited
We trim the elevator for a specific airspeed. This can easily be demonstrated, either with an instructor or alone, by adjusting the pitch trim for hands-off flight in the cruise configuration and at cruise airspeed, and then reducing the power to idle. The airplane will pitch down, speed up, pitch up, slow down, pitch down, speed up, pitch up, slow down, repeating the process through several oscillations until it stabilizes at the original airspeed in a glide. Now, apply climb power. The airplane will pitch up, slow down, pitch down, speed up, etc., and repeat this process until it once again stabilizes at the original airspeed, but this time in a climb.
Once again, it is much easier to juggle one variable than two, and in perfecting the pilot’s technique in making a stabilized VFR approach in the pattern, it drastically reduces the workload (not to mention the guesswork) if the pilot (or student pilot) establishes a stable airspeed with pitch, and adjusts his descent with power.
 In VFR pattern work, by stabilizing airspeed with pitch, and adjusting pitch as required as flaps are extended, the pilot need deal with only one variable – altitude: his rate of descent. This he can control with the throttle. Starting with the initial power reduction on downwind, prior to any flap extension, as he establishes a gradual descent straight ahead the pilot continuously asks himself, “Am I high, low, or just right?”
Throughout, he is glancing from airspeed indicator to the runway, airspeed-runway, airspeed-runway. Of course, he is also dividing his attention, checking for traffic, making radio calls, etc. From the initial power reduction on, through the turn to base, final, and touchdown, he makes whatever power adjustments are necessary to enable him to run out of airspeed and altitude simultaneously when he is about two inches above the runway, and another no-feel-the-touchdown has occurred.
“Sight Picture” Again
This “sight picture” technique works equally well (or perhaps even better) on the takeoff. The modern approach to teaching takeoffs is to do it by the numbers. Have the student line up on the runway, apply power, keep an eye on the airspeed indicator, and when the magic number comes up, ROTATE! This, of course, is the method used for high-powered singles, and all twins, jets, and air carrier aircraft, but it is not necessarily appropriate for the light, fixed-gear, fixed-pitch training airplane. One student who was taught this way lost his airspeed indicator while he was working in the pattern solo. And he declared an EMERGENCY! Needless to say, this caused a great deal of unnecessary activity at a very busy tower-controlled airport. Had this student been taught that if the aircraft attitude is right and the power setting is right, the airspeed must be in the ballpark, rather than being taught to depend on the airspeed indicator to the exclusion of all else, he certainly would not have felt the need to declare an emergency. Remember the formula, “attitude plus power equals performance”? This simple formula always works, no matter what the flight condition.
 A few years ago a fatal accident resulted from the failure of an instructor to impress on his student the fact that if the aircraft attitude is right, and the power setting is right, the airspeed must be within tolerable limits. A pilot with a fresh instrument rating on his pilot certificate noticed his airspeed indicator showing a gradual reduction while flying his Bonanza in IMC (instrument meteorological conditions, in cloud) over the Rocky Mountains. The pilot notified ATC that he was losing airspeed. In point of fact, of course, he was not losing airspeed at all. It was a classic case of his pitot tube icing up. In a desperate attempt to increase his speed and avoid a stall and possible loss of aircraft control, the pilot pitched the airplane down and dived into a mountain with the engine operating at near full power, killing all aboard. Of course, he happened to be flying an airplane that accelerates very rapidly when the nose is pointed down.
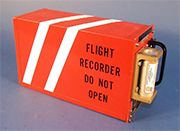
Then there’s the more recent case of the air carrier jet that developed a false reading in its airspeed indicators (plural) because of ice forming in the pitot tubes. As the ice builds up (and there are some conditions that no amount of anti-ice equipment will prevent), the first false reading is a higher than actual speed. Then, as the tube begins to completely close off, the apparent speed falls off to a much lower than actual speed, until finally the airspeed indicator needle goes to zero and just rests there as if the aircraft were standing still. The carrier pilots must have caught the change at the beginning of this process, for they thought the airplane was going too fast, so they pulled up in an effort to slow down, which of course they did. In fact the airplane slowed down to the extent that it stalled and entered a spin, again killing all aboard. Just the opposite of the Bonanza pilot who dove into the mountainside. This scenario was reconstructed from the flight recorder, the cockpit voice recorder, and the communications with ATC and is no doubt accurate.
In the case of the pilot with a brand-new instrument rating, it is possible to understand what he did (we can blame his instructor, his own stupidity, his inexperience, or any number of other factors), but it is literally incomprehensible that no less than three experienced air carrier pilots would all suffer brain fade at the same time and do what they did. What could they have been thinking? The answer is that they weren’t thinking, they were reacting as they had been taught, based on reliance on the airspeed indicator.
No Airspeed Indicator
 An entire class of aviation cadets, and I was one, during WWII went completely through their primary training (65 flight hours) without ever seeing the face of an airspeed indicator. The instruments were physically removed from the airplanes, leaving a hole in the panel! This experiment was evidently quite successful, for at least the average number of cadets from this class went on to graduate and become military pilots. (We had seen pictures of airspeed indicators in the books, but had never seen an actual instrument until the next phase of our training.) When I became an instructor, and ever since, I demonstrate during the course of training a private applicant how one can fly the entire pattern with the airspeed indicator covered as a result of this personal experience,.
The “takeoff by the numbers” approach to flight instruction is simply one more example of insulting the intelligence of the student pilot. The advocates of this type of training maintain that later on in the student’s aviation career he will be flying a complex single engine airplane or a twin and then, when he has to do it by the numbers, he won’t have the smarts to make the transition if his original training was by the “sight picture” technique. How much simpler and more effective it is if the student is taught to line the airplane up on the runway, apply power, keep it going straight with the feet, come back on the yoke (or stick) until the top of the cowl lines up with the horizon, and sit there and wait. When the airplane is ready, it will fly itself off the ground. The airspeed indicator can be glanced at or ignored. Of course, this technique doesn’t work in the case of a short-field takeoff which must be flown at a precise speed as must a climb at Vx or Vy, but it works just great if runway length is not a consideration.
Maneuvering By “Sight Picture”
 In making a steep power turn at a constant altitude, once again the “sight picture” comes in to play. In performing this maneuver VFR, the pilot must establish the bank angle by noting the angle at which the wing cuts the horizon, apply appropriate power and back elevator pressure to compensate for the lift which is now produced on the diagonal as the is airplane banked steeply, note the point on the cowl where the nose of the airplane rides around the horizon, glancing at the altimeter about every 90 degrees of turn, and wait for the proper point on the ground to come up, roll out of the turn, simultaneously reducing the back pressure on the elevator to return to straight and level flight. If the student attempts to make steep 360-degree or 720-degree turns by staring at the instrument panel, he is doomed to failure, for it is almost impossible for a student pilot to succeed this way. A good technique for practicing this maneuver is to make a 360-degree turn each way (left and right) with no hesitation between them. If the pilot fails to pitch the nose down as he rolls from one to the other, he will gain a substantial amount of altitude and defeat the purpose of the exercise. Naturally, as he establishes the second bank in the opposite direction, he must simultaneously reapply up elevator pressure to again compensate for the loss of the vertical component of lift resulting from the steep bank.
Aerobatic pilots fly by sight picture and only by sight picture, even though airspeed is critical in the entry to most aerobatic maneuvers. The experienced aerobatic pilot can almost feel the appropriate speed as it is approached. He then confirms it by reference to the airspeed indicator, establishes the proper sight picture, and performs the maneuver by outside references (sight picture) throughout. Virtually all aerobatic maneuvers are flown this way.
Navigating By “Sight Picture”
The early pioneer surveyors did all us aviators who came along later an enormous favor. They surveyed this country in a grid. Many of the lines on the ground (section lines, roads, etc.) run north and south, and east and west, giving us a great reference. As we gain experience we get to the point where we can eyeball the earth, the sky, the horizon, and the lines on the ground to establish our references. We can judge the angles and adjust our heading accordingly.
 Regardless of whether the approach is made VFR or IFR, ultimately the landing must be made by visual reference to the ground, and thus, once again by use of the “sight picture” technique. The pilot must “round out” for the flare and establish the sight picture of the landing attitude for the touchdown by visual reference to the runway and mother earth.
As between the rigid “fly by the numbers” system and the “sight picture” system, each pilot must do what works best for him or her. He/she must keep the objective in mind and do whatever is necessary to make whatever he is attempting to do come out right at the end. After all, it is the end result that counts.
I can’t fly, you can’t fly, only some birds and some insects can fly. However, airplanes can fly. In fact they do a beautiful job of it if we pilots leave them alone and let them do it. The only thing the airplane can’t do is think. That’s our job. Contemplate this. The designer creates a wonderful machine, the manufacturer builds it, and they hand it to us, the pilots, to operate it. The really good pilot is physically lazy. He is, however, mentally alert. The very best pilot is the one who does the least. He permits the airplane to do the work while he does the thinking.
One of the hardest things to convince the beginning student pilot is that the airplane is inherently stable, and that one does not have to be constantly driving it as if it were an automobile. We need only point it in the direction we want to go, trim it out, and let it take us there. As we all know, flying straight and level consists of making a series of small adjustments (some people refer to them as corrections, while others of us prefer to call them adjustments.)
Cross-country flying by pilotage is rapidly becoming a lost art. We now have so many marvelous electronic assistants to help us with navigation that we no longer need to pick out a landmark along our course and fly toward it until we can pick out another one farther along, and so on. This is only part of the difference in the way we fly today as opposed to the way we did it only a few years ago. As recently as the late 1940s and even through the mid-50s, flying was quite different from what it is today. This is not to say it was better or even more challenging, but it sure was more fun.
Rudder Use
Today’s pilots don’t seem to have any idea what that rudder is all about. They plant their feet firmly on the floor and drive the airplane through the sky as if it were an automobile, using the control yoke as if it were a steering wheel. And they can do this more or less successfully because the designers have made the airplanes so much better. For small heading changes with a very shallow bank it can be done that way, but if we observe an old timer at the controls we see something entirely different.
This pilot who was trained in older airplanes carefully trims the airplane to fly straight and level, places his feet lightly on the rudder pedals, folds his arms across his chest and goes about his business. His hands are free to fold (or unfold) his charts, drink his coffee, eat his sandwich, or whatever else he wants or needs to do. If a minor heading adjustment is required, he merely exerts a small amount of pressure on the rudder pedal in the desired direction, the airplane yaws slightly, rolls (and banks) slightly, and voila! – the airplane is now pointed in the correct direction. If a slight altitude adjustment is required, the pilot applies a small amount of pressure (either up or down) on the elevator control (either yoke or stick), changing nothing else until the desired altitude is reached, and again he lets go and permits the airplane to take him where he wants to go. This technique drastically reduces the pilot’s workload, freeing him up to divide his attention and scan the skies for traffic.
 Which brings up another area the modern pilot is prone to ignore. There are so many wonderful toys in the cockpit and on the panel that make demands on the pilot’s attention, that there is little time for surveillance of the area for other traffic. Just a few years ago almost the entire emphasis in primary training was on coordination of hand and foot (stick and rudder) and on looking around outside. Today, with the improvement in aircraft design rendering manipulation of the airplane easier, coupled with the sophistication of the airspace in which we operate, and all the marvelous gadgets making demands on our attention, it’s no wonder that the pilot is prone to neglecting the rudder and failing to exercise proper surveillance. And with the speed of the modern airplane resulting in enormous closure rates it is even more important than ever before to be alert for traffic. In the en route airspace it may not be crowded at all, but as we get near an airport at a common altitude, it can get pretty hairy.
Flight training in general runs some 10 or more years behind the state of the art. Consequently, until quite recently a great deal more emphasis was placed on forced landings during primary training. Early airplane engines were so prone to quit that on almost any given flight one could toss a coin as to whether he’d have an engine when he got back. Today’s engines are so infinitely more dependable that the emergency landing, although taught in primary training, no longer gets the emphasis it used to. On the other hand, now we must devote a lot more training time to teaching (and learning) electronic navigation and airspace regulations, as a result of the improvement in avionics and the increased sophistication of the environment in which we operate.
Flying On The Gages
 In the days before attitude instrument flying as it is currently practiced, instrument flying consisted of keeping the airplane upright using the Stark System. One, two, three, needle, ball, and airspeed while following a colored airway (one leg or another of the four course Adcock Range), and the airspeed was the least of these. It was the only one that had a backup. The pilot centered the needle in the turn and bank indicator (later called a slip and skid indicator, and finally, the turn coordinator) with the rudder, centered the ball with the stick (now it’s a yoke), and checked his airspeed indicator for pitch. How does that sound to those of you who were taught to “step on the ball” to control a slip or skid? This old system works under most, but not all, flight conditions, and we’ve come a long way since the days of the Stark System what with flight directors, horizontal situation indicators, and all the other marvelous new stuff we have today. The current method of attitude instrument flying always works in every flight situation.
However, when we add the sophistication of today’s airspace to the improvements in aircraft design and the new devices and techniques, it’s no wonder that today’s pilot is prone to neglect the rudder, and to fail to adequately survey the skies around him as he proceeds along his way. Basic airplane manipulation has become easier, engines more dependable, and flying as a means of transportation has become infinitely more efficient, but we have paid a price. What we must watch out for is to not let the price become so great that we end up with a net loss, rather than a gain. If we keep in mind that we can’t fly (but airplanes can), that we are still responsible to observe and avoid traffic, perhaps there will be no price to pay at all, and only benefit will result from the progress we are seeing.
Do It In Sequence Or Suffer The Consequences
By now it should be obvious that I’m not a strong advocate of the “fly by the numbers” system, but there are two situations in which it is absolutely essential that the VFR pilot fly by the numbers. By this we mean that the pilot must perform the necessary tasks in sequence, one, two, three.
The first of these is the situation of the emergency off-field landing as a result of loss of engine power. When a single-engine airplane loses its engine, what the pilot has on his hands is a glider, not a very efficient glider, but a glider nonetheless. The airplane won’t fall out of the sky. However, all the pilot has going for him is the few precious seconds of time until he encounters mother earth, for surely he will encounter mother earth. How he uses that time will frequently determine whether or not he controls the airplane to a nice smooth landing on a suitable surface that the pilot picked out and controlled the aircraft into, or whether the pilot permits the airplane to put him into some totally unsuitable area (trees, houses, rocks, etc.).
 There is one single, published airspeed that will keep the airplane in the air the longest. Go any faster and you’re coming down sooner. Go any slower, and you’re coming down sooner. Therefore, the pilot must latch onto the best glide speed, and trim for that speed before he does anything else. (Of course if he has a carbureted engine, he should apply carb heat while achieving the best glide speed.) Next he should look around for a suitable landing area, determine just where he is going to put the airplane if it won’t start, and start maneuvering toward the field while planning his approach (base entry to land into the wind, or whatever). Then, and only then, should he make any attempt at a restart. There are really only three things required to make an internal combustion engine work: fuel, air, and spark. Most likely, the engine stoppage is the result of fuel starvation.
Switch tanks, check that the ignition is on (you didn’t bump the key off with your big fat knee, etc.). If the attempt to restart the engine is successful, one need only fly away and go about his business. But if the pilot can’t get the engine going again, he will end up rolling out on a nice, smooth surface that he controlled the airplane into with no injury and no (or very minor) damage. On the other hand, if the pilot wastes his time attempting an unsuccessful restart while the aircraft is sinking at some speed other than the best glide speed before selecting a landing area, he may well find that his radius of action is so limited that there is no longer any suitable place to put the airplane, and he must take whatever is left available (our unfriendly rocks, houses, trees, etc.). One, best glide speed; two, select the area and plan the approach; three, attempt a restart!
The other situation in which the VFR pilot must “go by the numbers” is this: When a non-qualified pilot blunders into a cloud, just the weight of his left hand tends to pull down on the yoke, causing the airplane to bank to the left. This causes the nose to pitch down, which, in turn causes the bank to steepen, pitch to steepen, bank to steepen, etc. About now, the pilot glances up and sees the airspeed indicator needle in the yellow arc reaching for the red line.
 “My gosh!” He exclaims, “Look how fast I’m going!” He then grabs the yoke with both hands and gives a good, healthy tug, right to the stop. And when they find the wreckage, the wings or tail section is located some distance from the rest of what’s left of the airplane with the dead bodies in it. What’s happened is the pilot has pulled the airplane apart. We’ve all read about airplanes that have come tumbling out of the clouds in pieces. Well, in those cases the scenario above is frequently what’s happened.
In the situation described, where the airspeed is high and getting higher, the pilot simply must: One, kill the power; two, ease the wings level and, three, finally ease the nose up. He can then come back in with the power and resume straight and level flight. Remember, first power, next bank, and finally pitch!
Again, in the two situations outlined above, it is absolutely essential that the pilot perform the required actions in sequence, one, two, three. It can save your very life.
Usual Boilerplate: If you have a comment regarding this column, please post it here rather than sending it to me by direct email. That way others may benefit from your input.


