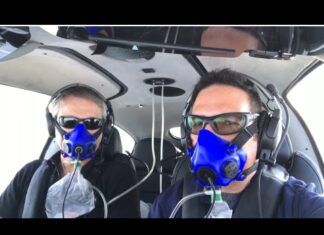
Preflight Briefing
Use formation-trained pilots!
Discuss a flight plan, where are you going, what kind of airspace, obstacles, etc.
Confirm radios operational and frequencies to use, with back up. Don’t fly without radio communications, and that includes an intercom!
Confirm airspeeds: Chase aircraft needs maneuvering speed
Turns: 360s are common part of the photo mission, talk about bank angles and directions.
Take a safety pilot in both aircraft if possible, more eyes the better.
Break procedure: Who’s going where when things aren’t right. Do not lose sight of other aircraft!
Photo Mission
Be airborne by sunrise or one hour before sunset. Low light looks best.
Search out uncluttered background. Avoid roads and buildings, use lakes or undeveloped areas. City skylines can be an exception to the rule.
Unless the photo requires a particular altitude, search out an altitude that’s smooth: minor turbulence can cause big problems in low light. High speed color negative films (160 ISO-400 ISO) can solve this problem.
Pick a heading that puts the sun between 10 and 2 o’clock, from the pilot’s perspective, for extended shooting time with a particular look. Then try flying several 360s for constantly changing light.
Position the subject airplane; look at existing photography for a feel on angles. If there is haze, get above it or fly low and shoot down. Try a polarizer and/or warming filters.
Don’t skimp on film. BRACKET EXPOSURES!
Prop Arc and Shutter Speeds
Have subject aircraft keep rpm’s up as much as possible.
Full prop disc depends on number of blades and rpm’s.
Piston aircraft: 1/250 and slower, 1/500 will work, but will probably freeze the prop.
For a full disc on a two blade prop, 1/60; for a three blade prop, 1/125.
Turboprop or Radial engines: These aircraft operate at lower rpm’s. 1/125 or slower.
Jets: No props…no problem!
When in doubt, shoot some at 1/500 to be sure you get something, then back off to the slower shutter speeds.
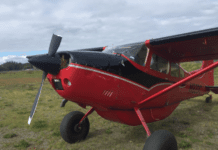
Ground Shots
Low light! First two hours or the last two hours of the day works best.
Look for uncluttered background.
Put the sun at the aircraft’s 10 and 2 o’clock position, depending on what side you shooting.
Clean up the control surfaces; level ailerons, elevators and rudder.
With the right position, any lens selection is valid.
Don’t just shoot eye level; lay on the ground, get on a ladder. Fuel trucks work great for a stable platform.
If you’re shooting at sunset or afterwards, use the color to your advantage. Walk around the aircraft and look for interesting reflections.
When in doubt, use a tripod and cable release. Unless it’s part of an intended look, a photo can’t be too sharp.
Use filters like polarizers, warming filters, graduated filters, etc.
Carry a handheld radio for communicating with the pilot if the aircraft is running.
Don’t skimp on film. BRACKET! BRACKET! BRACKET!
Interiors
Always park the aircraft directly into, or away, from the sun. This avoids or minimizes the direct sunlight contaminating the interior. If you’re shooting a panel, put the sun on the aircraft’s tail, or at your back. If you’re shooting a seating area, park it with the nose in the sun. Overcast days are great for shooting interiors, no harsh shadows.
Lens selection depends on the size of the aircraft; I use a 17- to 35-mm zoom for all of my work. Most interiors can be shot with a 24 mm or wider.
Shoot at least f/8 or more for extended depth of field.
Filter for the extra blue light from open shade, I use a KR3 (81C).
Shoot available light, it’s more natural. If you want, bounce a handstrobe off the headliner dialed down 1- 1 1/3rd stop from ambient light. This can brighten up some interiors. Be aware that the color of your headliner will cast the same color in the photo.
The light coming through windows of the aircraft can fool meters; the bright light tends to underexpose the interior. I overexpose 1 to 1 1/2 stops from what my meter reads.
Using a spot meter, if available, can avoid these problems.
Use a tripod and cable release when possible.
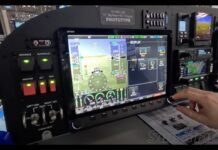
Panels
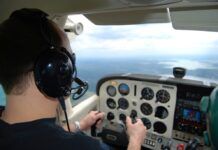
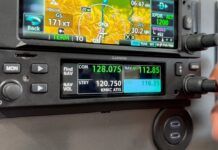
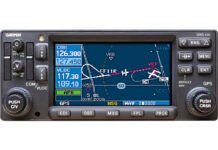
Turn on panel power for any lights, radios, GPSs, etc.
Shoot with ambient light so those lights appear on film, and use a bounced hand strobe to fill in, or brighten the panel. Panels also look great at sunset, or night.
Place the camera fairly high in the cabin, this helps with possible hotspots caused by hand strobes.
A 20mm lens is ideal for panels: 24 mm might get you by.
Drape a black cloth around the cockpit, out of camera view, to cut the reflections in the glass of instruments.
Spring clamps or duct tape works well to suspend the cloth.
Use a tripod and cable release when possible.


