This article originally appeared in the July 2002 issue of IFR Magazine and is reprinted here by permission.

Mnemonics, such as GUMP or CIGAR, are popular in aviation, although one of the most useful when approaching a terminal area might be hard to relate to: WCRR, or West Coast Rail Road. The only relationship between railroads and aviation is that they both involve transportation. Anyway, W stands for Weather (ATIS, ASOS, tower, or CTAF), C is for Checklist, R stands for Radio(s) setup, and the last R is Review the approach chart big stuff.Take that first R, Radios setup. Near the end of the trip when the controller issues a radar vector, you have carte blanche to complete the avionics setup for the approach. What are your priorities? The nav device that defines the final approach course is always set up first and the sooner the better. If it’s an ILS, select the localizer frequency and then turn the CDI or HSI to the published final approach course. Same with a VOR approach: Tune the VOR frequency, and then set the CDI or HSI. If it’s an NDB approach, the ADF is set up first. If it’s a GPS approach, the GPS is set up first. For a GPS overlay to a VOR or NDB approach, I’d lean toward the GPS because it gives so much extra information — bearing, track, distance — which enhances orientation along the final approach course, and then the VOR or ADF. When you’re in a terminal radar environment and you get a vector, you should be like Pavlov’s dog — turn to the vector heading and then attack the radio stack. Vector equals carte blanche for the setup.In setting up a VOR approach final, the frequency has to be linked with the inbound course. One without the other is a task half done. When a localizer frequency is selected the CDI indicates the course, regardless of the course selection. It’s a good habit to set the frequency and then the final approach course whether a VOR, ILS, or localizer approach, even if you don’t have an HSI. Always do it the same way to reduce the chances of an error.Some years ago, Jeppesen asked for advice on the arrangement of something new on approach charts — briefing boxes. I think they got it exactly correct: Frequency, course, glideslope crossing altitude, DA, airport elevation. Without glideslope it reads like this: Frequency, course, and important altitudes on final approach.Over the years, I’ve seen some weird things happen in the cockpit, such as pilots setting up a number-two first, in order to establish a cross bearing, and meanwhile flying through the final approach course fat, dumb, and momentarily happy. Or they’ll monkey around with RNAV at a critical time when the final approach needs to be tuned. These variations on the setup procedure often don’t succeed because the airplane and time keep marching on.Where good setup habits really pay off is in an unusual situation, say, a missed approach that leads quickly to another approach at a nearby airport. Perhaps Mother Nature throws a curve ball with a sudden wind switch that instantly changes the approach and landing runways.Methods will vary with panel arrangements. The standard everyday stack contains the audio selector on top, then comm one and nav one, and below is comm two and nav two, and below that other radios. If you’re up-to-date, a GPS is stuck prominently below the audio selector/marker beacon. If you mentally push the top of the panel forward, the top VOR is toward where you’re going and the bottom VOR is behind you, or performing a secondary cross-bearing role.Occasionally, I fly an aircraft that has the CDI with glideslope indicator located below the CDI with no glideslope indicator. This bottom CDI with glideslope needle is used to define the final approach course. So the lower VOR/CDI is set up first. In this case, if it were my airplane, I’d get them switched.
The Screw-up
The mechanics of VOR setups should always be done the same way. First set the frequency, and then set the corresponding CDI. When flying right seat in a Twin Otter on departure from San Francisco’s Runway 28R, I observed a different technique.It was an uncomplicated departure: Track straight ahead on the San Francisco 281 radial and hang a left on the Sausalito 168 radial. The left-seat pilot took a swat at my hand (this was before CRM) when I began setting up the radios for the departure.”Dammit, I’ll do that,” he growled, and set up the number-one frequency on the Sausalito VOR, and then set the number-two frequency on San Francisco VOR.A little distraction took place, and he tuned in the number-one HSI to the San Francisco 281 radial and the number-two CDI to the Sausalito 168 radial. If I’ve lost you here, he’d switched CDI courses with the frequencies.

While holding a good heading and climbing out through the clouds he, a highly experienced pilot, smelled a rat. “What the hell is going on here (no live needle)?” Not saying a thing I made an X motion and pointed my pencil to the Sausalito freq on nav one, the CDI course selection on nav two, and the nav two freq and the number one CDI. To avoid the setup screw-up — confirmed — the corresponding CDI should come right after the freq. Or maybe he was just checking to see if I was paying attention?
Which Distance?
If DME is mentioned in the name of the approach — VOR-DME, LOC-DME, ILS-DME — then DME becomes a higher priority in the setup sequence, second to the final approach course. There have been more than enough accidents where DME was set to the wrong navaid, and then letdowns were made based on wrong distance information.You must know to what navaid the DME is linked: Is it linked to an ILS-DME or VOR? Which VOR? Some DMEs have a three-position selector: Nav 1-Hold-Nav 2. When Hold is selected, the DME frequency does not change when a new frequency is selected on Nav 1 or Nav 2. At many airports where a localizer with no paired DME exists, the on-field VOR with DME is used for distance. The VOR is tuned in, DME distance acquired, Hold selected, and put in the localizer frequency — you still have your distance from the VOR. Any time you see data, say distance, without source frequency displayed, you have a chance for a mistake. So keep the DME selector on Nav 1 while flying around, until you need Hold. Remember, Nav 1 is where you’re going. Paranoia is justified. Watch for phony distance information. Positional awareness, careful scrutiny of the approach chart, and proper stack setup will prevent these potentially lethal errors.With RNAV there are distances and there are distances. When the airport identifier is entered, distance is to the ARP (Airport Reference Point), which is usually shown on the airport diagram on the approach chart. Normally, the ARP is located near the center of the airport. Other distances are: to the MAP, which is usually at the end of the approach runway, distances to a VOR transmitter, or to a DME transmitter often near the localizer transmitter. These distances can differ by over a mile.
GPS Setup
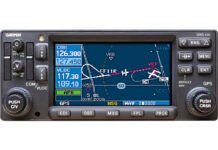
There are two choices in setting up Garmin 430 and 530s for ILS or localizer approaches (or raw data VOR). First choice: Enter the nav freq with the left knobs and push it up to the active position. The advantage of this method is that it’s fast. The second method is to push the PROC button for procedure and then pick an approach. The big advantage of the second (PROC) method is that you get all that great distance information to a final approach fix, and then it sequences to the MAP. If it’s an ILS or localizer approach, remember to push the frequency up (VLOC flip/flop) to the active position for raw data and CDI for remote HSI or CDI indication. Check the VLOC or GPS readout on the bottom left of the display to see if what you want is, indeed, what you’ve got.While riding in a Twin Comanche with a UPS GX55, I had the opportunity to figure out the flight-plan setup. In flight plan mode — at 30 miles out — it displayed a message asking if, and what, instrument approach was desired. Pressing Enter activated the desired procedure.Timesharing of scan between the flight instruments and the avionics during the setup prevents slow rolls, death spirals, unusual attitudes, heading deviations, and altitude excursions. I find that it’s imprudent to camp out on the avionics setup. Use of George Autopilot on heading or nav and altitude modes during the setup still requires keeping an eye on the flight instruments and on George. During the setup is when ATC interrupts with a new altitude or heading. But, hey, that’s what makes things interesting.
In The Boonies
We’ve discussed the setup in terminal radar environments, but how about non-radar environments out in the boonies? It depends on the approach. Often you navigate to a VOR then go out and make a procedure turn and come back. The only killer on that is not resetting the OBS back to the final approach course during the procedure turn. The number-one job on a procedure turn is to reset the OBS to the final approach course.With HSIs it’s still a good idea to have the arrow index pointing to where you’re going. Reset the HSI even though technically you don’t have reverse sensing since the compass and needle unit turns upside down on the course reversal. And should you have a financial reversal and have to fly an aircraft without an HSI again, you still have the good habit pattern.Other approaches may involve a transition, such as arcs, to intercept the final approach course. Depending on your avionics panel arrangement, your priority should be to get the final freq and course setup accomplished as far ahead as possible. Navigate to the fix on final using a secondary nav unit. It’s really fundamental instrument stuff but critically important.
Back Course Setup
How long since you’ve done a back course? If you have an HSI, you dial in the front course bearing to steer toward the needle like normal. But if you don’t have an HSI, I still recommend that you put in the front course as a possible reminder that you have to fly away from the needle to bring it in. When you get rich and get an HSI, you’ll have the procedure down pat.The final approach fix is usually defined by a cross bearing from a VOR, a DME distance from a VOR or ILS-DME, or a radar fix. If it’s a radar fix, be sure to ask the controller to “call the marker or final approach fix.” Some also call it the “radar spot.” Remind the controller again when on the final approach course.
Identing Navaids
Sometimes when you go to identify the VOR/LOC frequency, you can’t quite get it well enough for a good ident until you get closer to the final approach course. So the best time to ident is after the setup. You ident, don’t you? Hey, at least ident the highest-priority item — the final.I was once in the back seat of an airplane returning to San Jose, Calif., with a FAA examiner in the right seat and my client — who’d just had a successful checkride — occupying the left. The San Jose ILS frequency for runway 30L was 110.9. While on a vector, the pilot put in 109.9 — one click away. The real 109.9 happened to be at nearby Oakland Airport’s runway 27R. Yep, he checked the Morse Code — lots of dots and dashes — and no doubt thought, “That’s it.”I couldn’t kick the back of the seat, because the examiner might’ve kicked me out of the airplane. Luckily, traffic caused the controller to re-vector us, thus inadvertently saving the client from snatching defeat from the jaws of checkride victory. In the pilot’s rescan of the stack he found the error and re-idented the frequency, carefully examining each letter of the Morse Code. Whew.
Avionics Scan
After identing the navaid, it’s good to start at the top of the stack and scan down to make sure that all the radios are where they should be, including the audio switch for marker beacon aural. Look for errors in frequency and OBS setting.The exact panel scan route will depend on each avionics installation. Take a look at what you have there on the panel and set up a scan that catches everything for your avionics arrangement. On some aircraft it may start on the HSI, and then move over and down to below the throttle quadrant, and then over to the right in front of the co-pilot.
Nordo On Final
Some years ago, a Cessna 210 took off from Long Beach, Calif., for Santa Monica via V459 Darts direct. It was solid IMC all over the LA Basin. DARTS is located on V459 where it crosses the final approach course to Santa Monica and requires a left course change of 107 degrees. When the aircraft arrived at DARTS, the pilot could not communicate with ATC because the frequency was overloaded. It was reported that the controller had about 80 communications during this critical time. A short time later the 210 collided with higher terrain northwest of DARTS.The AIM addresses the procedure to follow when you’re passing through a final approach course on a radar vector. Again, the importance of setting up the final approach course ahead of time can’t be overstated. In this situation the AIM says the pilot should “query the controller.” But what if you can’t, for whatever reason, query the controller? It’s then time to act.During IPCs and instrument ratings, I address this nasty situation in the preflight oral by reviewing the pertinent AIM information and FARs about lost comm procedures and pilot-in-command authority. In flight I act as the controller and simulate a cluttered frequency as the pilot is vectored to final.First — big surprise — have the final approach course dialed in, and second, when there’s a live needle on the final approach course, query the controller. That’s not always possible with a jammed freq. So, never, never, never go more than 30 seconds through the final, into the unknown without explanation, such as, “This is a vector across the final for spacing.” What should you do? Turn to intercept the final and shoot the approach. A cluttered freq is the same as lost comm in this situation.Yes, there are other alternatives such as entering hold on the final inbound, but that’ll scare the hell out of a controller. Face it: The lost comm procedures for shooting the approach are nebulous in the slam/bam radar environment.What is clear is that your gluteus maximus preservation is priority one. Take the initiative. Don’t worry about the controller (whom you may be helping out); worry about other traffic. The most likely way the controller gets hurt is to fall off his chair. Remember the old saw: “If the pilot screws up, the pilot dies. If ATC screws up, the pilot dies.”
Practice The Setup
One of the best exercises to fine-tune the setup is to hook external power to your parked airplane, turn on the avionics, grab an approach chart, and then time yourself on how quickly you can set up the avionics for the approach. This practice results in faster acquisition of approach chart details, and setting up of the radio stack.Be sure to practice using the correct priorities. After about 10 different approach setups the time required drops dramatically, typically from 120 seconds to about 40, and efficiency and accuracy improves.
Departure Setup
What I’ve emphasized here is the approach setup. How about departures? Most before-takeoff checklists have: Avionics — SET FOR DEPARTURE. That job gets done when the aircraft is either not moving or is at taxi speed. Yep, some do it after takeoff when the job load is heavy, but that’s usually an oversight, in some situations a dangerous oversight.In many places where high terrain is nearby the departure can require an exacting track(s) for safety. I was standing around a deserted FBO waiting for passengers at a little airport with no approach or departure procedures in the book. The weather was deteriorating. I happened to notice faded typewritten instrument departure procedures stapled to a wall. “Hmmm …” Looked to be a good procedure based on what I knew of the topography, but, more important, it emphasized the need to include any stray nugget of information into my IFR setup. Bottom line: Use whatever mnemonic device you choose — WCRR, GUMP, or checklist — just consider the setup to be a basic instrument procedure. Based on what I’ve seen on IPCs, it might be worth examining and possibly rethinking your setup procedures.


