 The airplane purchase process isa long and difficult one for most people, especially first-time airplane buyers. That’sbecause there is a great deal of hard work involved. If you want to be sure that theairplane is worth the purchase price and is in the condition that has been described toyou, several essential steps must be taken prior to consummating the deal
In everyday life, we try to make everything we do as simple and easy as possible. Whenit comes to buying an airplane, however, there’s no easy way out. If you handle yourairplane purchase like you might an automobile, you are leaving yourself wide open forproblems.
Now more than ever
 The author’s 220-page book “Purchasing & Evaluating Airplanes” offers an in-depth treatment of this subject. |
It was different back in the 1970s when light planes were being produced in largenumbers, and most of the ones being sold on the used market had very low airframe times.You could be fairly certain that an airplane with less than 1,000 hours on the airframeand no damage history would not kick you in the wallet too hard if something went wrongafter the purchase was completed. Back then, a prepurchase inspection generally consistedof a compression check, a quick AD search, and a cursory inspection of the airframe.
Today, it’s an entirely different story. The average age of the general aviation fleetis 30 years, and some of the airplanes on the market have over 10,000 hours in service.Not only are lightplane prices much higher (most have appreciated handsomely in recentyears), but the price of replacement parts for them has gone completely out of sight. Tothe prospective buyer, this means serious sticker shock if anything significant goes wrongafter the purchase. When mechanical problems turn up and the bills for unscheduled repairsstart coming in, often during the first year after purchase, it isn’t long before the newowner starts questioning whether aircraft ownership is such a good idea after all.
That’s why a prepurchase inspection is so vital…and why it shouldn’t be just a quickonce-over, but a thorough look at the airframe, engine, systems, instruments and avionics.The more complex the airplane, the more time and energy must be put into a prepurchaseinspection.
Who’re you gonna call?
As soon as you’ve decided what kind of airplane you want to buy, you’d be wise to startgiving serious thought to how your prepurchase inspection will be conducted, and by whom.Some mechanics refuse to do “prepurchase” inspections. They claim that theydon’t want the liability if something goes wrong after the airplane changes hands,especially if it involves something they didn’t look at. Consequently, you should beprepared to provide your mechanic with a detailed list of things you want done during theinspection. At the end of this article is a checklist of itemsthat I recommend including as part of every prepurchase inspection.
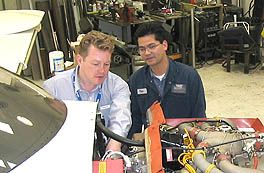 Different mechanics have different views ofhow a prepurchase inspection should be done. Some mechanics look at the very basics:they’ll do a compression check, verify that AD compliance is up-to-date, and briefly lookover the airframe for current damage or the signs of previous damage. Other mechanics willinsist on doing what almost amounts to an annual inspection before they are satisfied. Notmany mechanics have the knowledge or equipment to check the instruments and avionics.That’s why it’s so crucial that whomever you choose to do the work understand preciselywhat you want, and advise you if he cannot accommodate you.
By asking your mechanic do a thorough job on the prepurchase, you’ll know that theairplane is safe to fly, and be reasonably confident that nothing major is going to causeyou any grief in the foreseeable future. A cursory inspection, or none at all, can leaveyou open to all sorts of problems that are preventable.
I am amazed at the number of people today who buy a used airplane without doing anyprepurchase inspection at all. I get calls from them all the time, generally after theyhave had their airplanes for a while and things are not going smoothly. The ugliest casesinvolve airplanes that were represented as “no damage history” but subsequentlyturn out to have been damaged. Most of those callers are worried whether the value oftheir aircraft has been diminished by the just-revealed damage history or the repair worknecessary to make the aircraft legally airworthy.
Sometimes, a buyer can sue to recover the amount of diminished value if it can beproved that the seller knew there was damage history and covered it up. But the cost ofrepair work is almost never recoverable. That’s why you do a prepurchase inspection. Oncethe bill of sale is signed, the aircraft is yours, along with any problems it has. Mostpurchase and sale agreements state explicitly that there is no warranty of any kindoffered with the sale.
Airplanes aren’t automobiles
Years ago the owner of a Cherokee 180 asked me to sell his airplane. It was a low-timeairframe, though it desperately needed a paint job. An acquaintance at the airport calledme as soon as he saw my ad and said he had just decided to buy an airplane of that type.He asked that I take it to Mac, a mechanic at another airport whom I also used to maintainmy own personal airplane. If Mac passed the airplane, he told me, he would buy it.
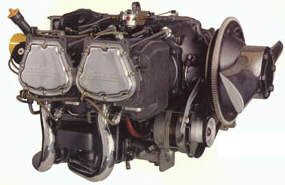 Mac was a very thorough mechanic, and it didn’t takehim long to find that the compression on two cylinders was low. He put a borescope in eachof the cylinders and told me that he thought there were broken rings because it looked asif the cylinder walls were scored.
I called the owner and told him what Mac had found. He replied that he didn’t believethere was anything wrong, but to be sure he’d take the airplane to his regular mechanicand have it checked. A week later I got a call from him saying his mechanic had given theengine a clean bill of health.
I decided to call the owner’s mechanic myself, and we had a little chat. The mechanictold me he’d used an automotive compression gauge and tested the cylinders’ compression.The automotive tester is placed into a spark plug hole, and the engine is rotated usingthe starter. The gauge records the highest pressure that is trapped in the cylinder duringthe test, but that doesn’t tell much about the cylinder’s health.
There’s a big difference between an automotive compression tester and the differentialcompression test that is standard procedure for aircraft engines. Using the differentialpressure method, the mechanic pumps 80 PSI of pressure into a cylinder through acalibrated orifice with the piston at top-dead-center, and measures how much of thepressure the cylinder retains. Seventy PSI (“70/80”) or more is consideredexcellent compression. A measurement of 60/80 or less will mean more testing, but there’sa significant likelihood that the cylinder will have to be pulled and repaired.
Needless to say, after my conversation with the owner’s mechanic, I dropped theairplane from my list of airplanes for sale. Not too long afterwards, I heard that theengine on the Cherokee quit on a cross-country flight. The pilot/owner had to make anoff-airport landing that resulted in substantial damage but, fortunately, no injuries.
Airplanes are not automobiles and cannot be treated like them. They must be maintainedby people who know what they are doing and what the standards are for airworthiness. It isvital that the mechanic you use for your prepurchase inspection be thoroughly versed onthe particular model of airplane you are buying. Your life and the health of your bankaccount could depend on it.
Those dreaded ADs
Research into the aircraft’s Airworthiness Directive (AD) compliance is a veryimportant part of any prepurchase inspection. ADs can be very expensive to comply with,but non-compliance with an AD can render an airplane unairworthy. Few potential buyers arein a position to check AD compliance themselves, and some mechanics don’t do a thoroughjob of it either. So, when you discuss your prepurchase inspection with the mechanic youselect, make sure he or she understands that you want a thorough AD search done.
One problem that occurs occasionally is that a mechanic will make an entry in a logthat he has complied with a particular AD without giving any details. If the AD hasseveral methods of compliance, that can lead to problems later. For example, an AD on alanding gear side brace may require an inspection every 500 hours and replacement of thebrace at 3,000 hours. If the mechanic replaced the side brace because it was found to befaulty but the logbook stated only that the AD was complied with, the brace would probablybe replaced again much sooner than necessary. Worse, the replaced side brace might be animproved part that was no longer subject to the AD, but without a complete explanation inthe logbook a new owner and his mechanic might have a difficult time determining whetheror not the recurring provisions of the AD still applied. When considering the purchase ofan airplane, the availability of detailed maintenance records are a big plus.
More stuff to check
If you are buying a retractable gear airplane, make sure your mechanic puts theairplane on jacks and does a thorough evaluation of the landing gear system. Each strut,trunion, brace, linkage and actuator should be checked for excessive play and wear. Thegear should fit snugly into its wells and complete the extension and retraction cycleswithin the cycle times specified in the service manual. Gear doors should fit properly,and their hinges should be free from excessive wear. Some landing gear systems can be moredifficult than others to maintain, but any retractable system that is worn or neglectedwill be expensive to repair.
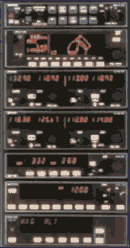 Part of the prepurchase inspection is insuring thatthe instruments and avionics all work. Unfortunately, most mechanics are not well-versedon avionics, and many airports lack a shop with the necessary knowledge or test equipmentto check them. If a radio shop is available on the field, make sure you include it in yourprepurchase inspection plans. It generally will take an avionics technician no more thanan hour to check out the radios and instruments. If you can’t take the plane to anavionics shop, another method is to fly the airplane after the mechanical portion of theinspection is completed and check out the radios and instruments yourself. If you’re notfamiliar with the equipment, make sure you find someone who is to make the checks.Sophisticated equipment such as autopilots, flight directors, weather radars and GPSreceivers can have many features that should be tested, but if you’ve never used thatmodel before, you probably won’t know how to check it.
Cost considerations
What should a prepurchase inspection cost? It varies depending on the type andcomplexity of airplane you are looking to buy, what the mechanic finds wrong with it, andhow deeply you want him to get involved. Four years ago I paid $500 for the prepurchaseinspection on my Piper Arrow, and it was worth every penny. The shop that did the work wasoutstanding, and when they were done I knew exactly what was wrong with the airplane. Thediscrepancy list added up to nearly $3,000 in repairs, including two cylinders that hadsmall cracks around the spark plug bosses. After some negotiations with the owner, wecompleted the deal and I flew the airplane home.
Many shops will not quote a flat rate for a prepurchase inspection. It is usually doneon a time-and-materials basis. If the shop rate is $50/hour and the inspection takes 8hours of labor, you are looking at $400 plus whatever materials are needed. Parts cost isusually minimal, but should include an oil filter (because the mechanic should cut theinstalled one open to inspect it for metal), and possibly other materials such as gaskets,cleaning solvents, and a quart of oil to replace what was in the filter.
If the annual inspection is coming up in the next three months I try to turn theprepurchase inspection into an annual. It’s not always possible, and the cooperation ofthe seller is required because the airplane is tied up longer than it would be for aprepurchase inspection. Not only does that give your mechanic a better look at theairplane, but you don’t have to stop flying it three months later for an annual.
If you are in the market for an airplane, be certain that you take all the mandatorysteps that are required before taking delivery. The prepurchase inspection is vital to asuccessful sale no matter who you are buying the airplane from and what the apparentcondition of the airplane is. Skip it, and your new airplane could turn intodisastrousmoney pit.
Prepurchase Inspection ChecklistHere’s a list of prepurchase inspection items. A knowledgeable person other than the mechanic can do some of the cosmetic items, but any discrepancies that are seen should be pointed out to the inspecting mechanic for his appraisal. Before Inspection
Airframe
Engine
Logbooks
After Completing Inspection
Avionics (If Radio Shop Is On Field)
|


