


It would be fair to say my plans for last April didn’t originally include building a rudder in my spare bedroom. However, when the opportunity arose to participate in Zenith Aircraft’s first-ever virtual rudder-building workshop, there was no way I was going to miss out. Since airplane building wasn’t something I’d tried before, I honestly had no idea what to expect. Luckily, it was a very pleasant surprise.
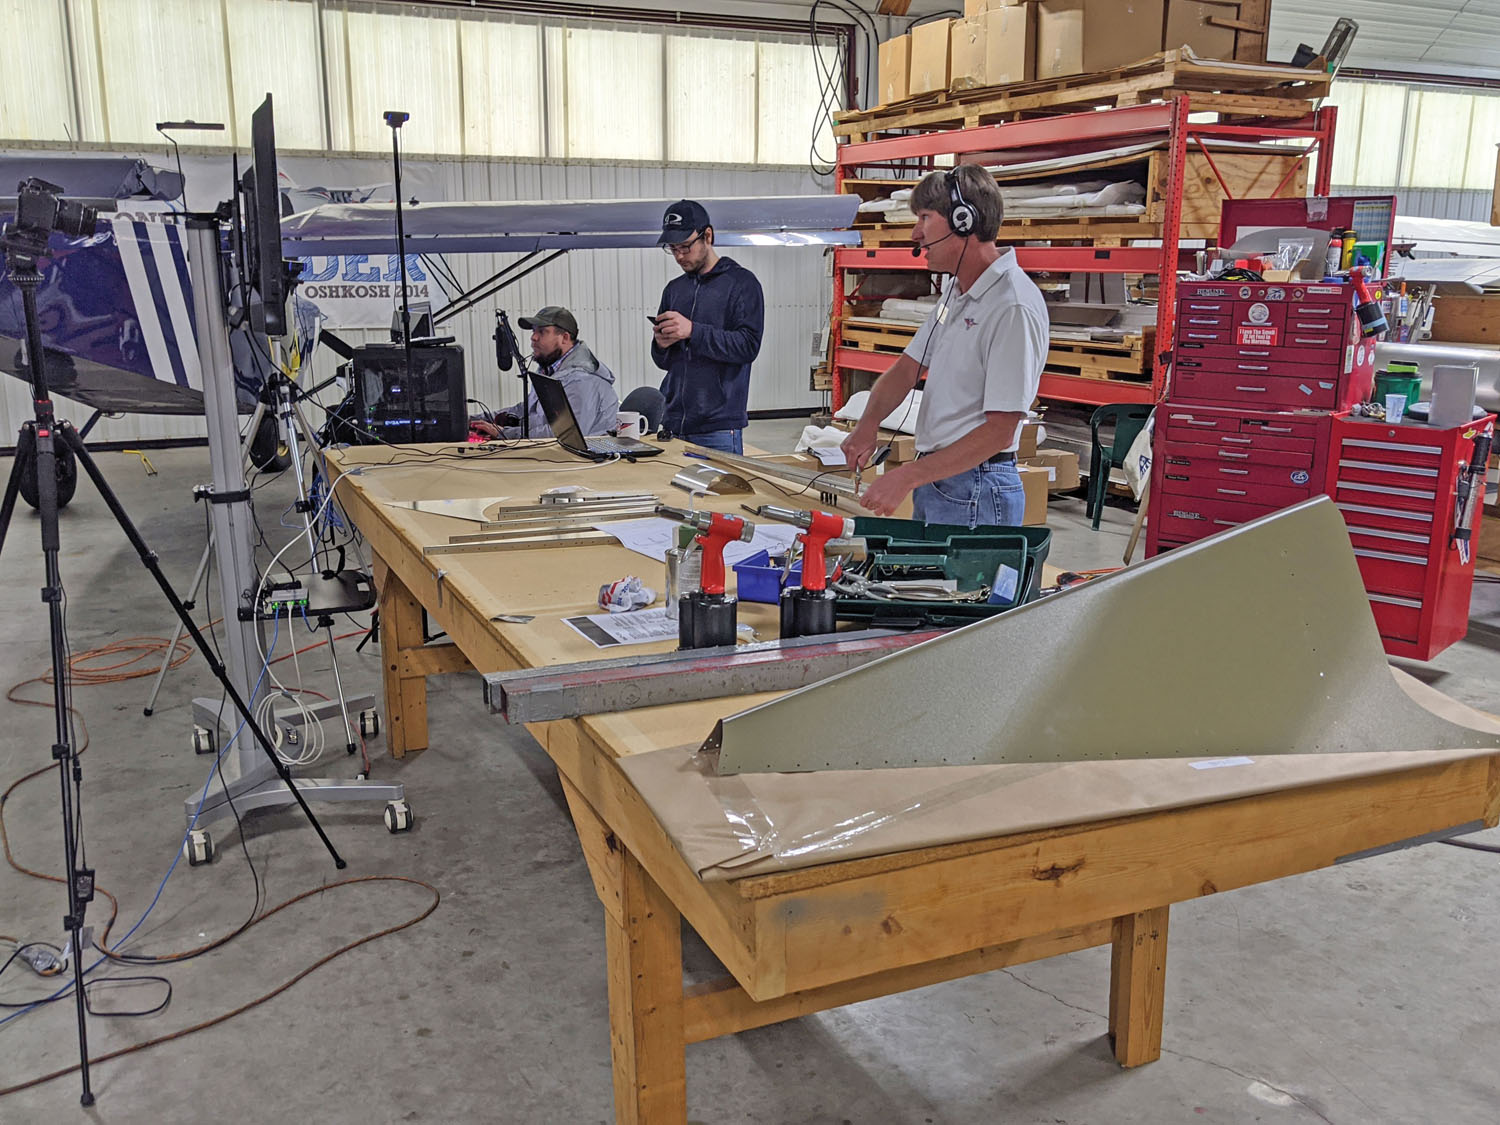
The move to an online format for the workshop came about due to the travel restrictions and social distancing practices necessitated by the coronavirus (COVID-19) pandemic. The workshop was run by Zenith’s Sebastien Heintz and Roger Dubbert, and focused on the STOL CH 750 Super Duty rudder. To hold on to the camaraderie of an in-person group build—and get professional eyes on our work—each participant set up a camera or two at their workspace.
Finding My Workspace
There’s a lovely workshop on the family farm where the communal collection of tables, tools and spare two-by-fours live. Normally, I haul any building projects that come my way out there so I can eat my aunt’s cooking, use her (better) tools, take up too much of her workspace and generally pretend like I’m 16 again. However, with several states and a couple of coronavirus-prompted stay-at-home orders between me and construction comfort, other arrangements were necessary this time around.
Having spent a few years in Boston, I’ve lived in much smaller apartments than the one in which I currently reside. That said, finding a spot to put together a functional workshop was an interesting conundrum. After consulting with the other similarly shut-in denizens of our abode, the second bedroom was sacrificed for the cause and agreements were drawn up regarding the exchange of baked goods for a day of listening to riveting without complaint.
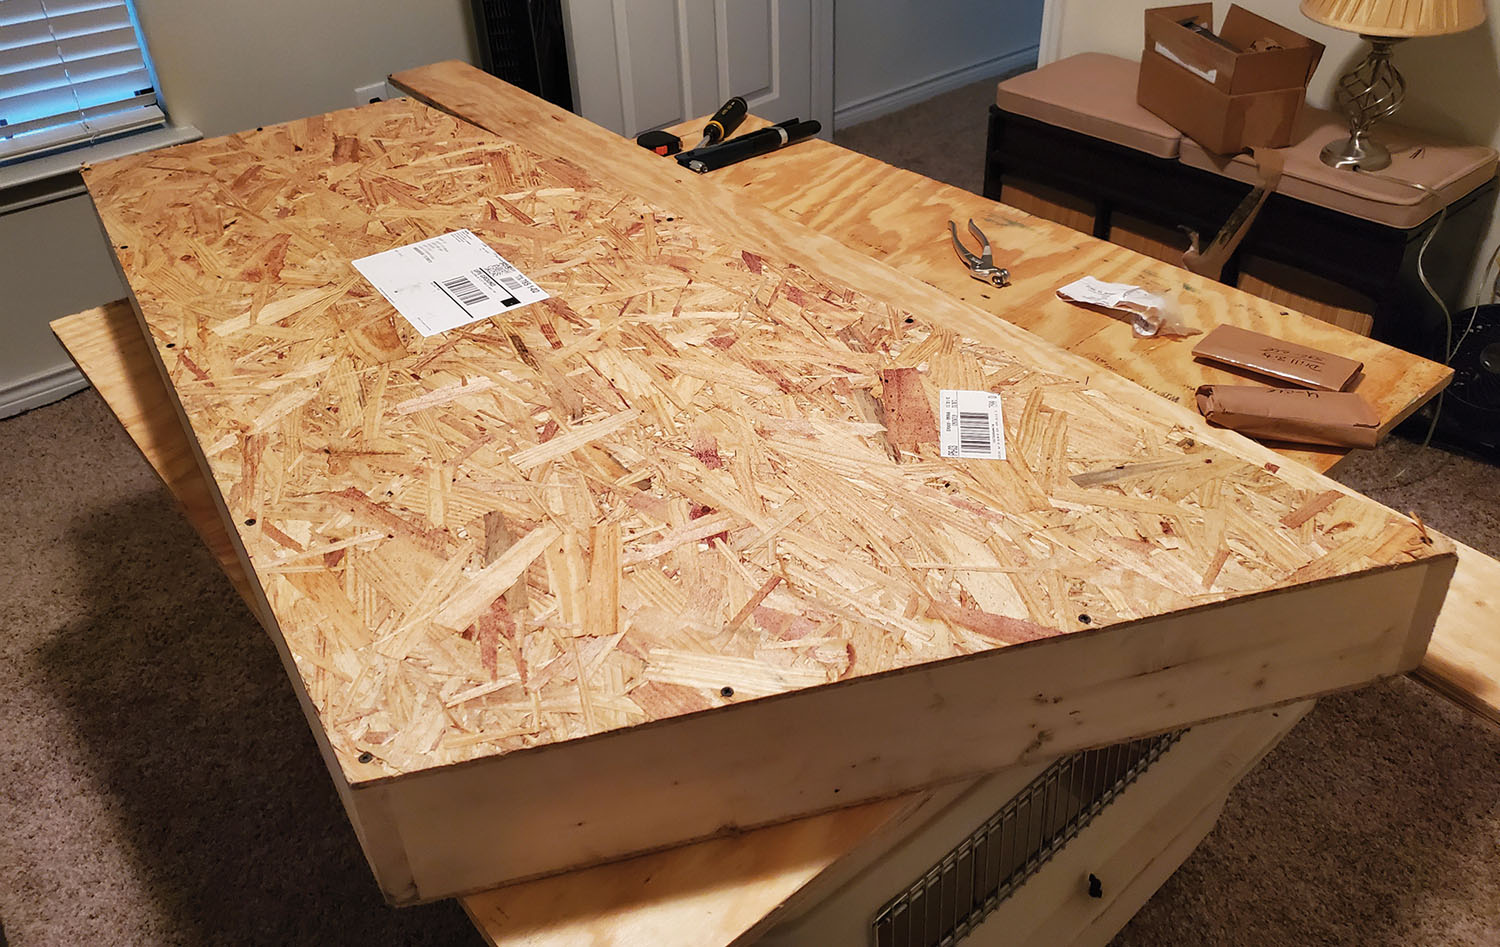
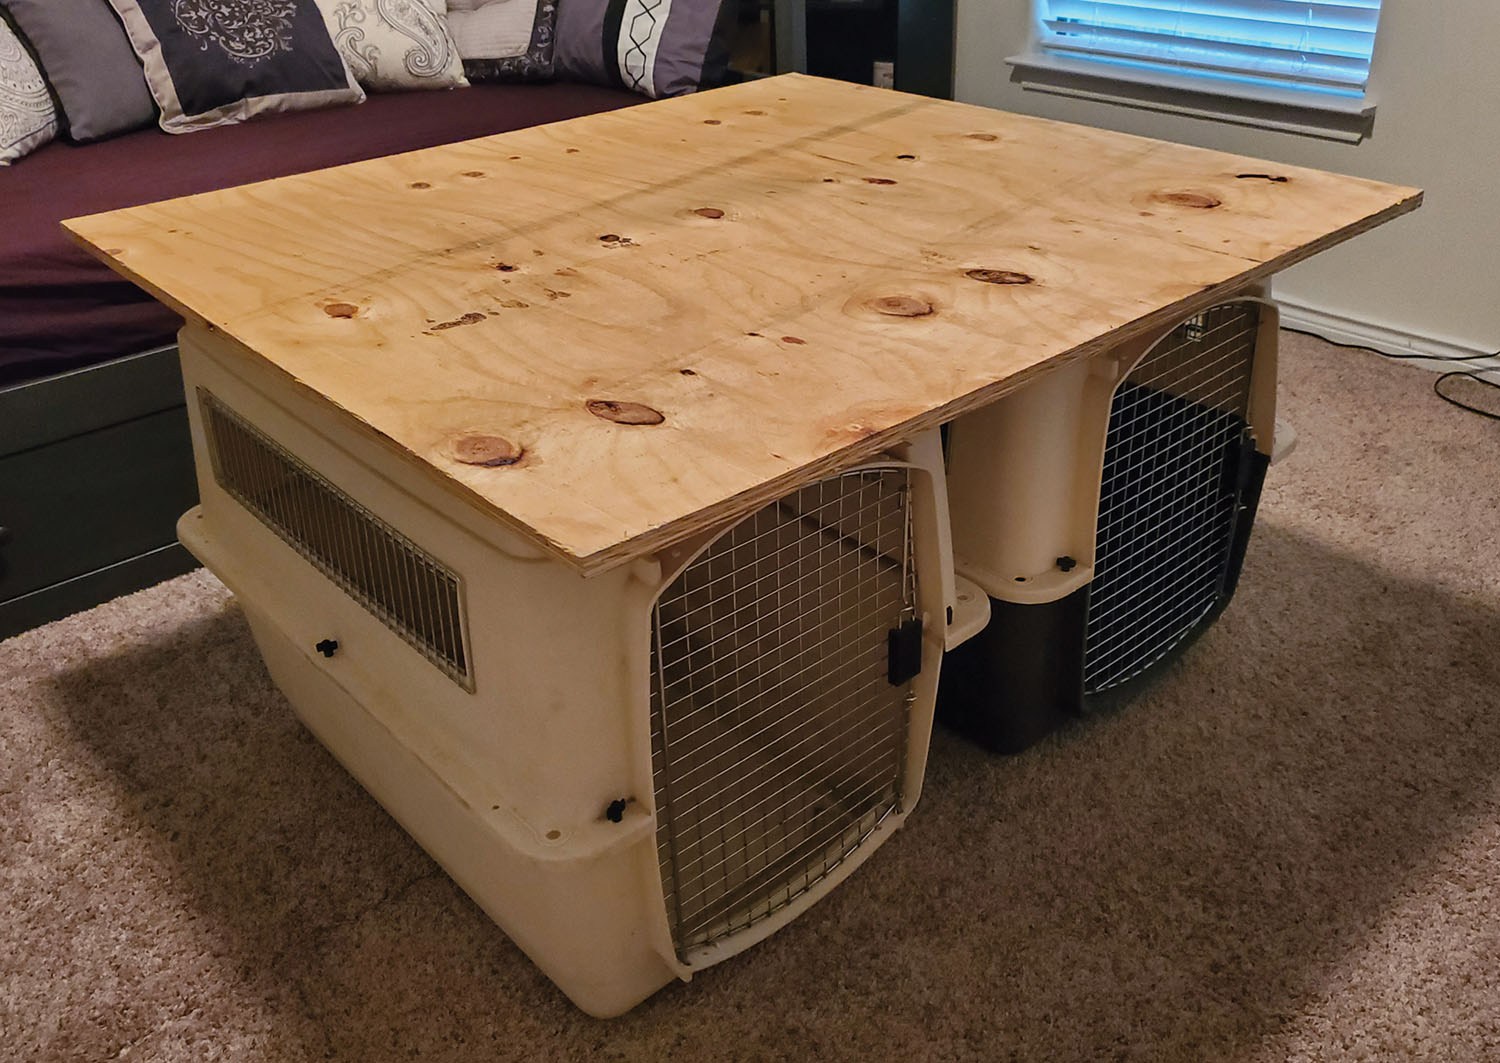
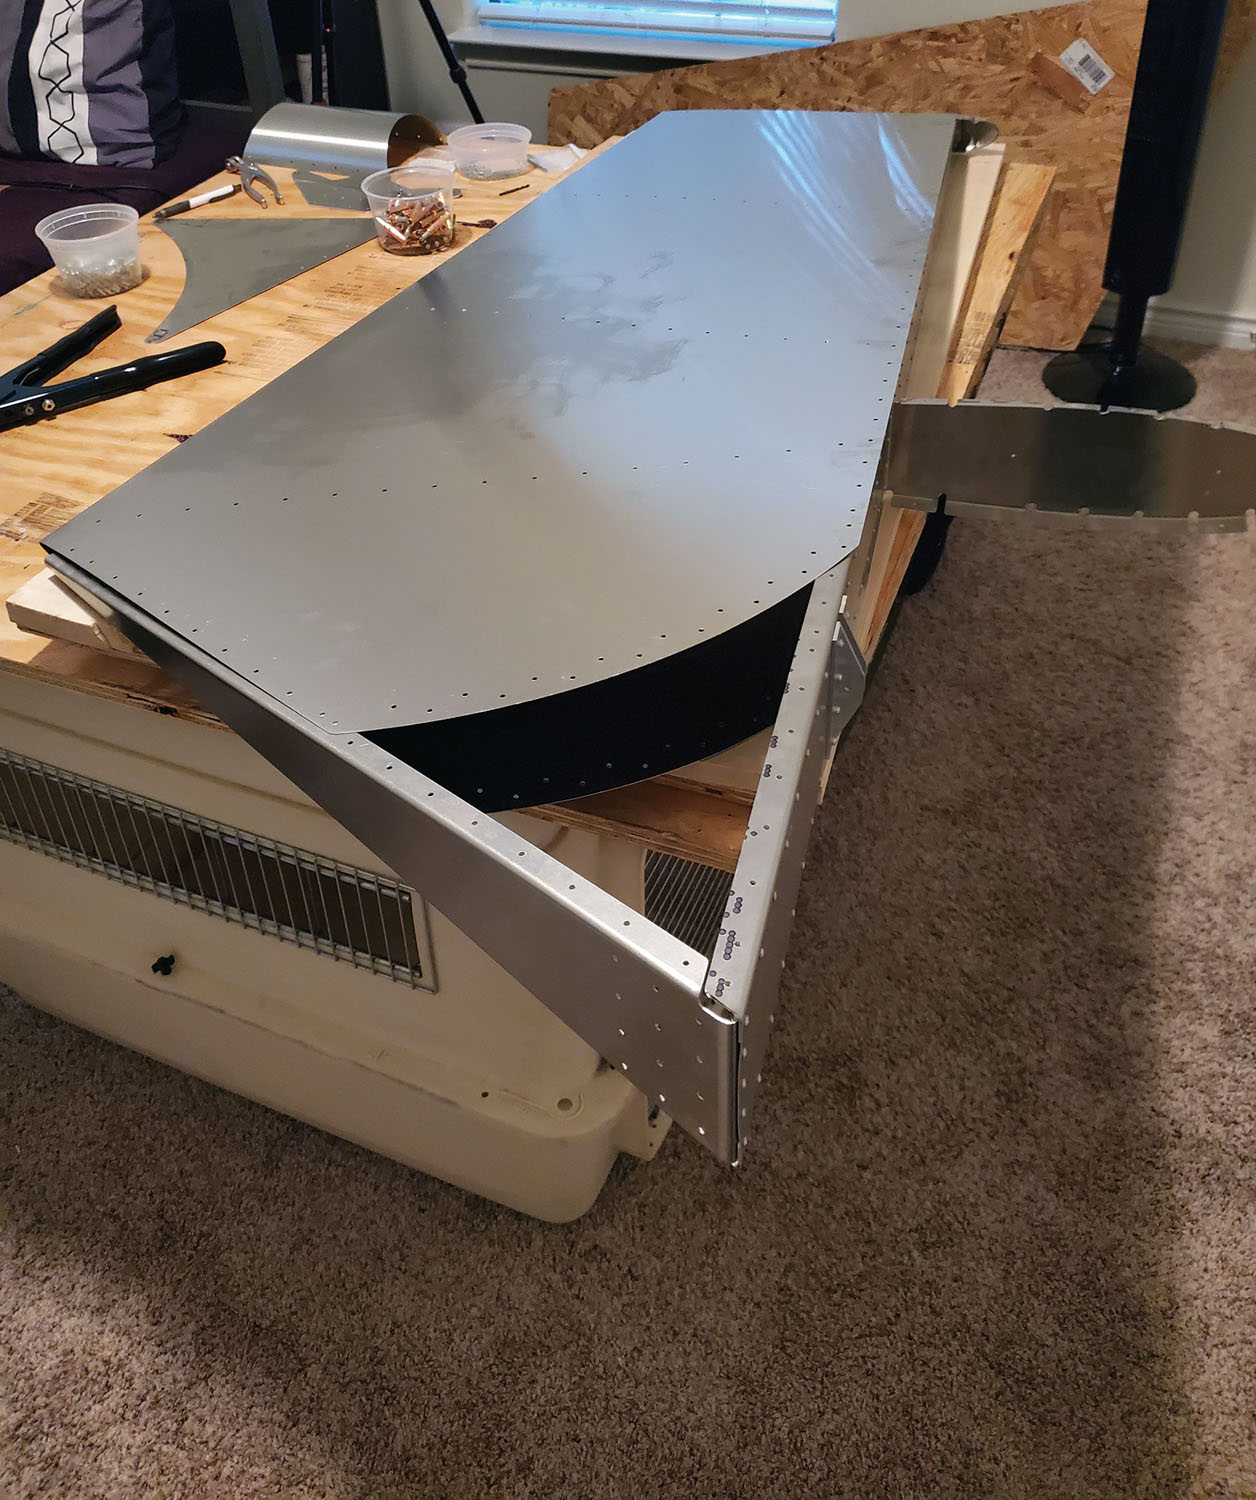
Once the furniture was moved, I started staking out the apartment complex for additional materials. The day before the workshop, I struck gold and came across several freshly discarded pieces of wood tucked behind the waste bins, including a 4-foot-long section that made a nearly ideal tabletop. Using the dogs’ travel crates as a base, I finally had a usable worktable.
Homework
When I signed up for the workshop, Zenith sent along links to a collection of online resources aimed particularly at getting first-time builders up to speed. Topics included using blind rivets and Clecoes, the art of deburring, tools needed for the project, drilling out bad rivets and adding corrosion protection. They also sent links to several videos of full CH 750 rudder assemblies.
In addition, the rudder kit came with an introduction manual. Along with providing information similar to that reviewed in the online resources, the 26-page manual touched on everything from basic sheet-metal construction and materials handling to time and cost planning for homebuilders. It’s also where the step-by-step assembly guides and illustrations for the aircraft are located.
Being new to this whole thing, the supplemental resources were an excellent and necessary starting place for me. They were clear and concise without being overwhelming. All in all, it took me about 3 hours to go through the how-to materials before getting started, which definitely felt like time well spent.

Setup
The rudder kit arrived a day before the workshop. Given that I first contacted Zenith about participating just 10 days earlier, I was amazed at how quickly they were able to get me the kit and the tools. The rudder kit itself was securely packed; all the parts were well wrapped and arrived in pristine condition. I unpacked and verified the inventory with the included packing list. As part of the separate toolkit they offer, Zenith supplied a hand riveter, Clecoes and Cleco pliers, a measuring tape and drill bits.

Perhaps the peskiest thing about getting the parts ready was removing the stickers with the part numbers on them. They proved to be infuriatingly tenacious. After experimenting with a few of the recommended removal methods, I found—admittedly much to my surprise—that a one-to-one solution of baking soda to coconut oil, rubbed in with a cloth, worked best.
I did use a flat file and a drill bit to deburr the parts before getting started. It was around that point I discovered my drill was MIA. With less than 24 hours until go-time and not being able to venture out to get a new one, I did without. That led to being very, very careful about how I was setting the rivets and occasionally having to use a bit more brute force than I would have preferred. For this project, it ended up only being a minor issue but not one I would care to repeat.
Zenith offered two optional setup sessions via Zoom prior to the workshop. The first was primarily an opportunity to get to know our fellow builders and to pepper Sebastien with questions. During the second, he inspected our workspaces and camera arrangements along with offering setup tips and discussing how the workshop itself would run. I attended both sessions and found them to be useful and informative.

The Workshop
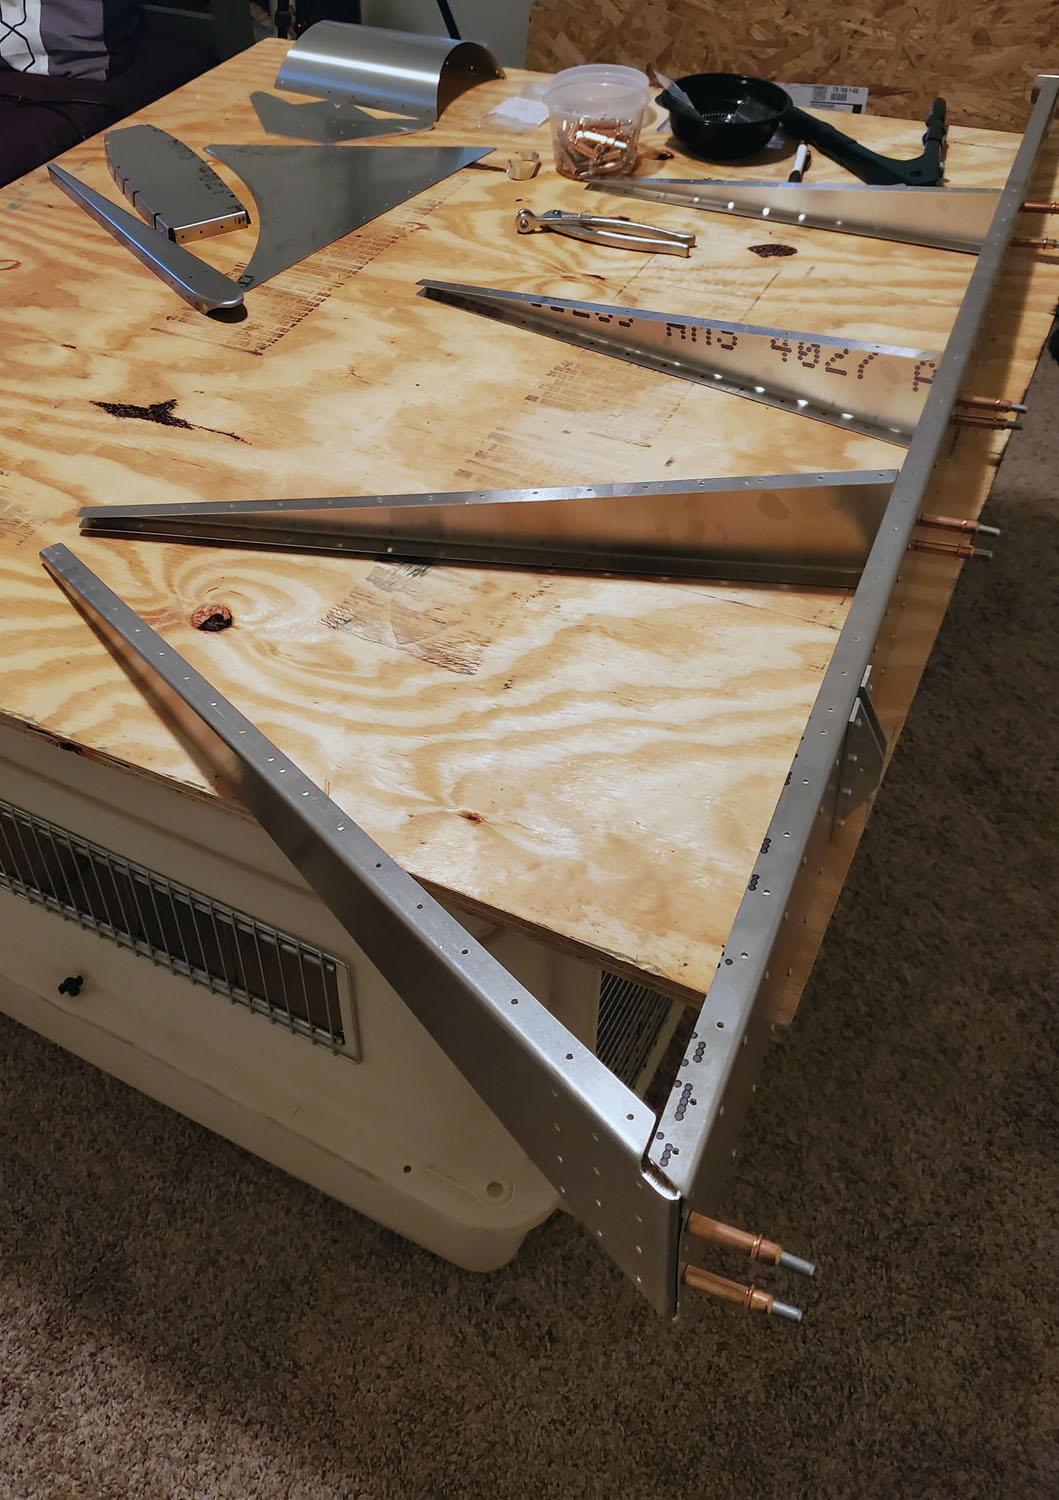
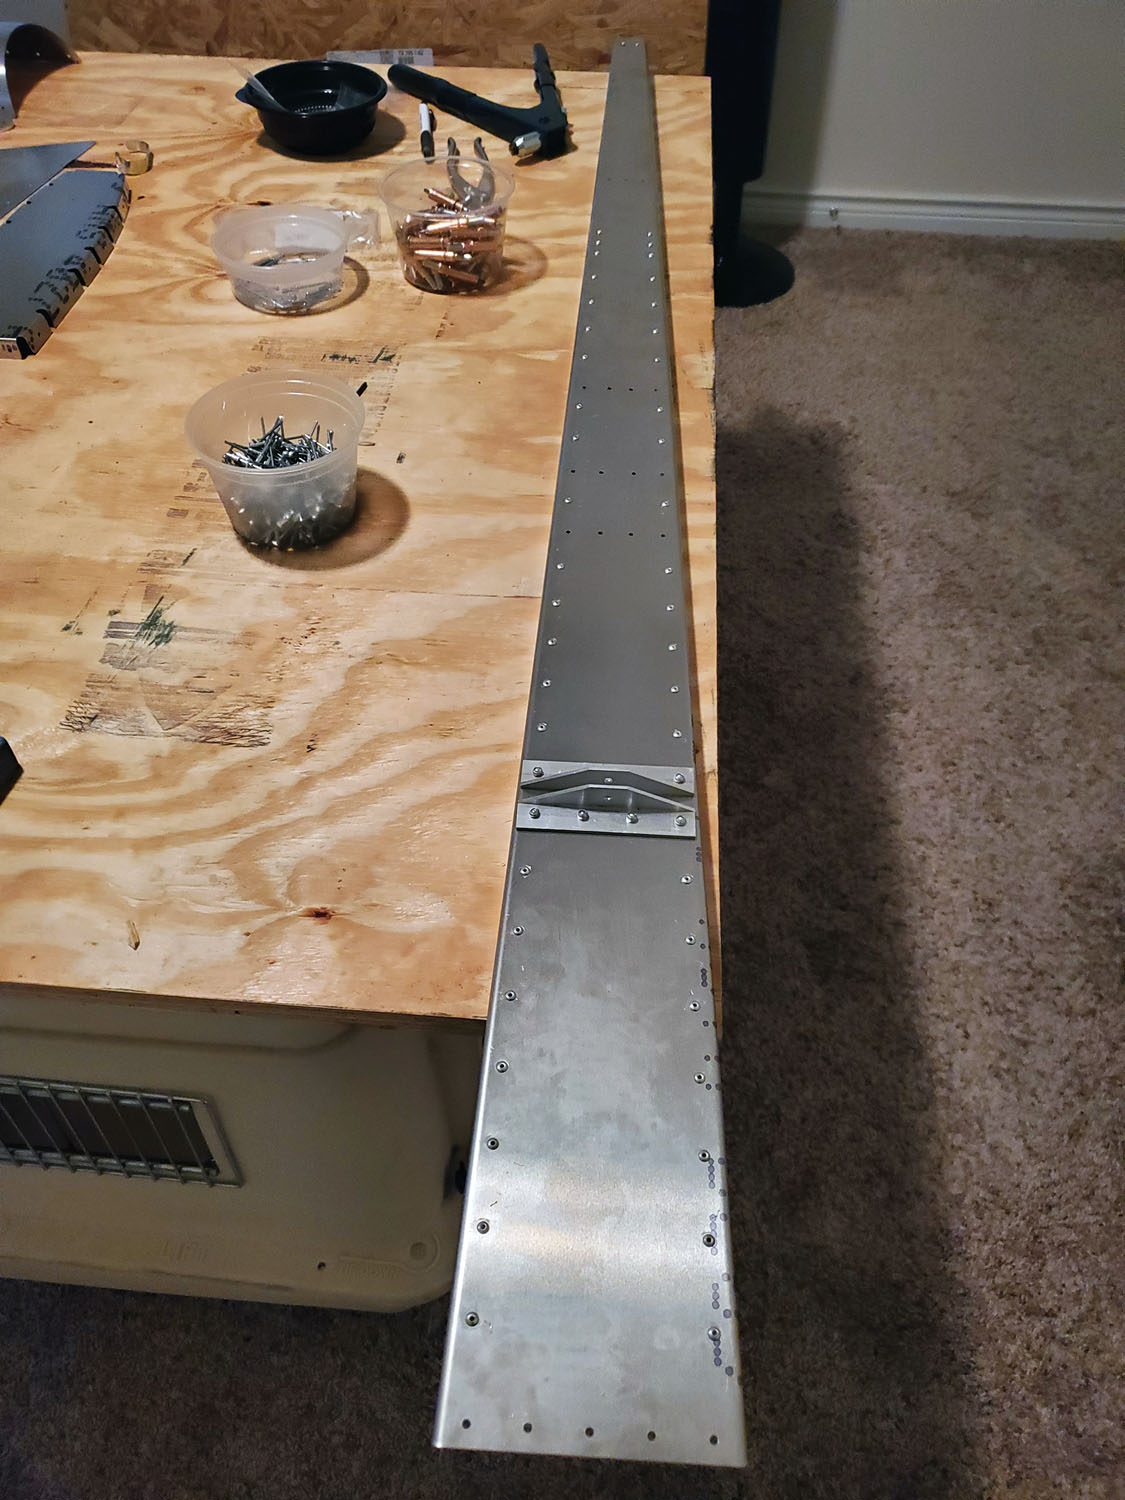
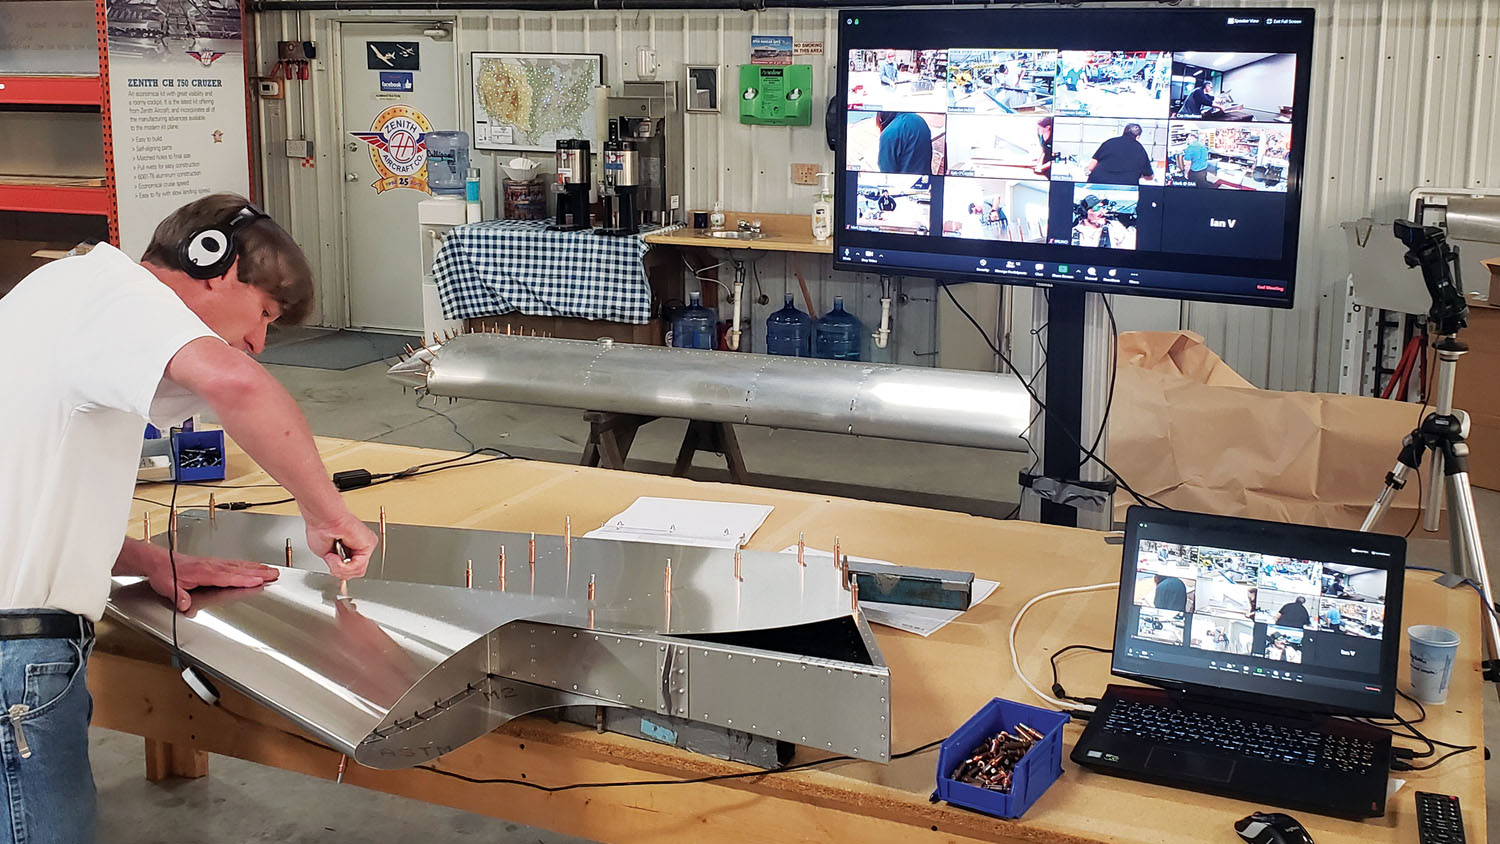
The workshop started at 9 a.m. Central time. After a quick round of intros, Roger walked us through assembling the rudder skeleton, demoing the process as we all worked. Once the majority of the participants were finished with a section, he moved us along to the next. He and Sebastien kept an eye on us builders throughout the day and offered suggestions and corrections as needed.
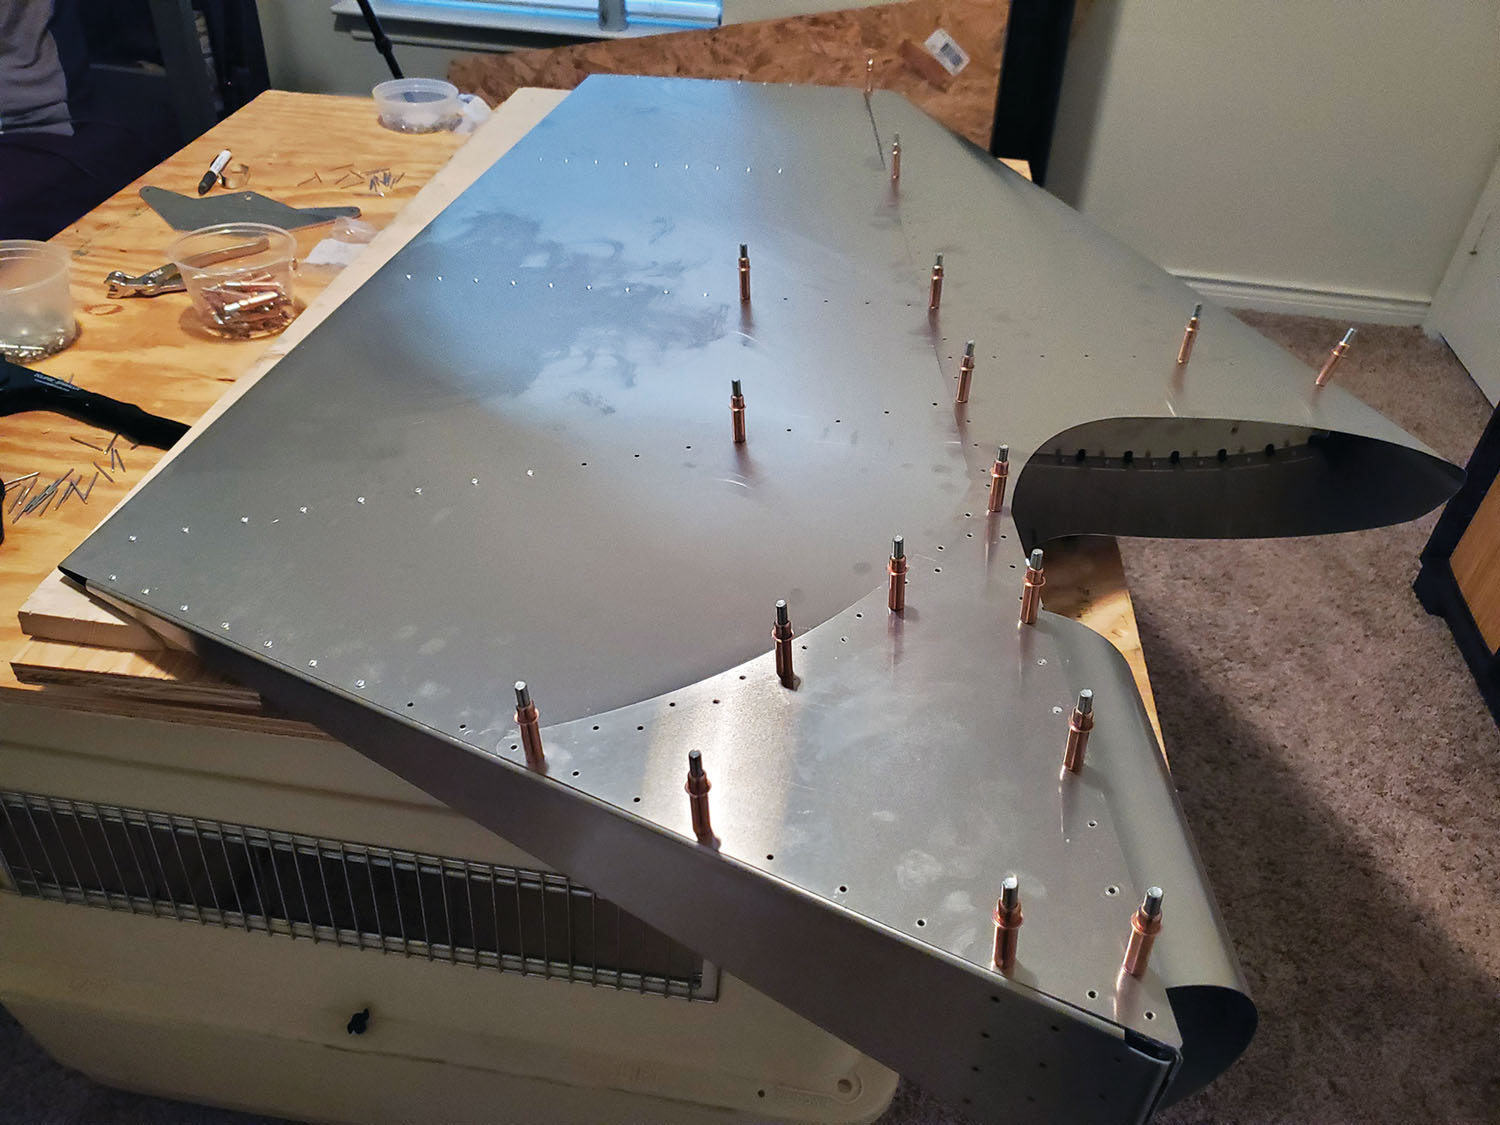
The building process itself was remarkably simple. Since the rudder parts are all predrilled and bent—and aren’t heavy or big enough to need a second pair of hands—it was mostly a matter of lining them up, clamping them together and riveting. That said, there’s a huge difference between my amateur ability to make all the bits stick together and the craftsmanship displayed by the people who knew what they were doing. For me, that’s where attending the workshop made the most difference. I picked up a lot of tips on how to approach the project, tricks regarding tool use and a heads-up about trouble spots to watch for that likely would have taken me forever to sort out on my own.
Over the course of the workshop, the crew at Zenith took breaks from the build to give us a look at what else was going on over in Missouri. They started with taking us through using the 3D SolidWorks model of the aircraft, something I can imagine would be invaluable to those lucky enough to be building more than just the rudder. They also gave us a walking tour of the factory—where we all discovered that their Wi-Fi doesn’t quite reach the far corners of the facility. Zenith staff, quick on their feet, quickly addressed this problem with a switch to a cell-phone camera. Once recovered, they went over a completed Super Duty. There was mention of doing a demo flight, but the weather never cleared up enough to allow for a virtual ride-along. They have since posted a virtual demo flight to their website and YouTube.
During the extra activities, participants could either stop and watch or keep building as they preferred. Given that I was using a hand riveter, I mixed and matched depending on just how much I was missing my air compressor at the time. We wrapped up around 2:30 p.m. with almost everyone having completed their rudders.
Takeaways
The folks at Zenith struck a great balance between informal and directed. It was easy to ask questions and get help without feeling like we got off track. Overall, the pace felt just about perfect, and I was comfortable that if I was messing anything up too badly, it would be spotted.
On the technical side, the workshop went smoothly. Other than the minor glitch with the factory tour, the live-stream worked out very well. The demo rudder was easily visible and the audio was clear and didn’t lag. Even knowing that they have a fair bit of experience filming their products and doing demo builds, the quality of the event made it a little difficult to believe that this was Zenith’s first live virtual workshop.
As a bonus, the workshop was streamed on YouTube and Facebook. People viewing it on those venues could comment or ask questions, which were then relayed to Roger and Sebastien. The audience participation aspect made for some good questions and additional helpful tips.
While I wouldn’t want to see Zenith switch to doing only online workshops—and I very much doubt that’s their plan—the ability to hold them seems to be helping the company reach people for whom making the trip would be challenging. One participant had his young children helping off and on during the day, which likely would have been difficult, if not impossible, to do at the factory. For my part, it meant I could take half a day for building and be back at my desk in time to turn out a few news stories for AVweb.
As a first-time builder, attending the workshop provided a lot of useful support. It helped to know that if a problem arose, there were several highly knowledgeable people on hand to get it sorted along with providing extra eyes to catch my newbie mistakes. It was also just plain (plane?) fun!
Building My First Airplane (Section)
The first time I helped my father bend cedar strips for a canoe, it seemed a little like magic. Somehow, the boards that had been stacked in the workshop for weeks—minus a few hours floating in the bathtub—twisted themselves into entirely new shapes and, bit by bit, turned into a boat. While the medium was different, there was a lot about airplane building that felt the same.
I’m not sure what this project would have been like if I hadn’t spent most of my life with tools in hand. As it was, although I hadn’t used a riveter or Clecoes before, a few minutes poking around YouTube and a bit of practice were enough to be getting on with. That was my experience with most of the Super Duty rudder build: With a little research and the right tools, it was a relatively easy—and highly satisfying—undertaking.
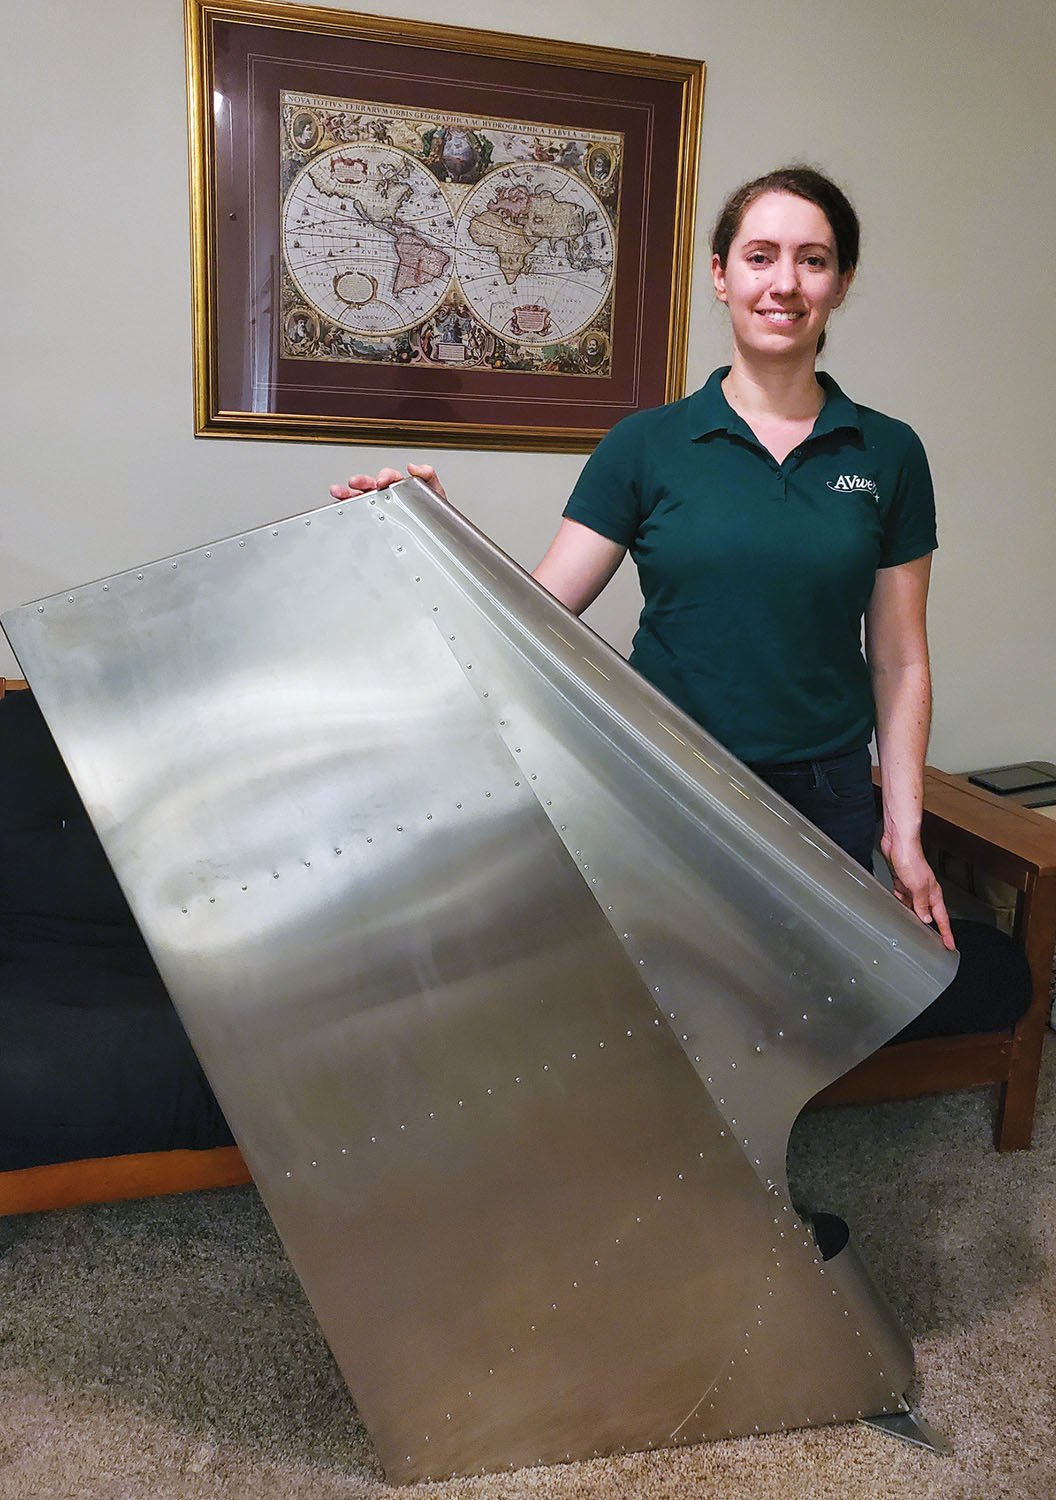
All told, in somewhere around four and a half hours, I managed to turn a pile of metal into an identifiable airplane section. Having accomplished that much, it hasn’t been all that hard to imagine picking up another section somewhere down the line, which is how I’m going to end up being that crazy person who built an airplane in her apartment.
—K.O.
This article originally appeared in the September 2020 issue of Kitplanes magazine.
For more great content like this, subscribe to Kitplanes!

Great article!
Go for it Kate! Order the next kit! No turning back now.